
System User menu
The System User menu is available only to administrator users. It is the central place for managing users and their access.
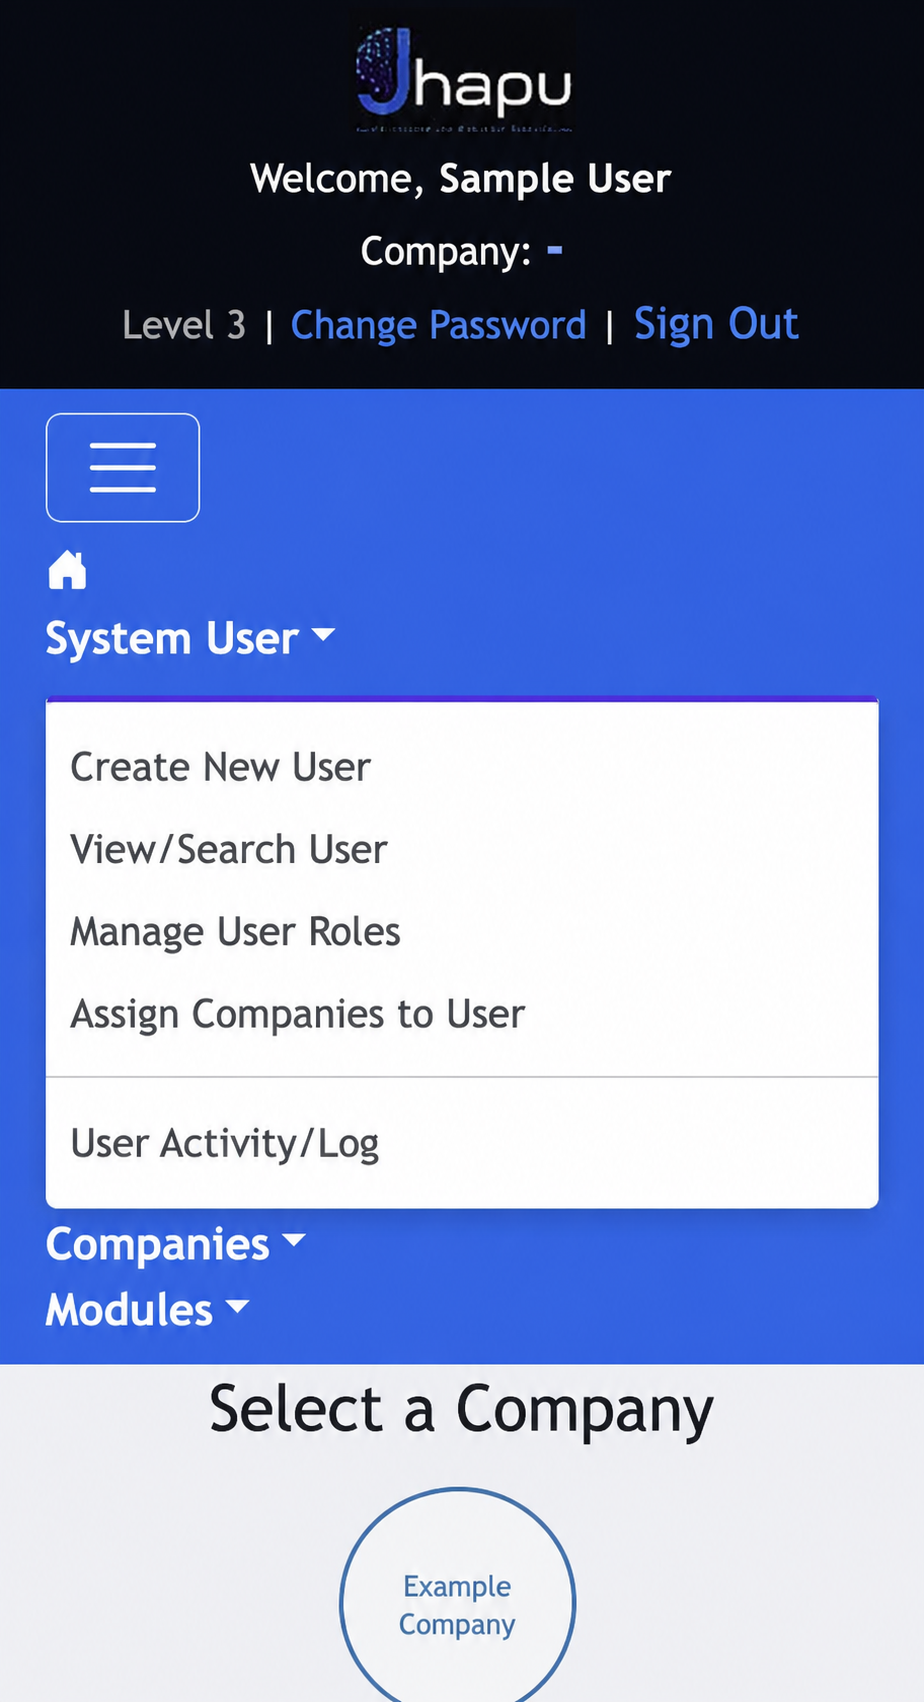
- Create New User: create an individual account for a new user.
- View/Search User: find an existing user and review or edit their details.
- Manage User Roles: manage roles and the permissions associated with each role.
- Assign Companies to User: control which companies are enabled for each user.
- User Activity/Log: review recorded user activity and log entries.
Users and company access
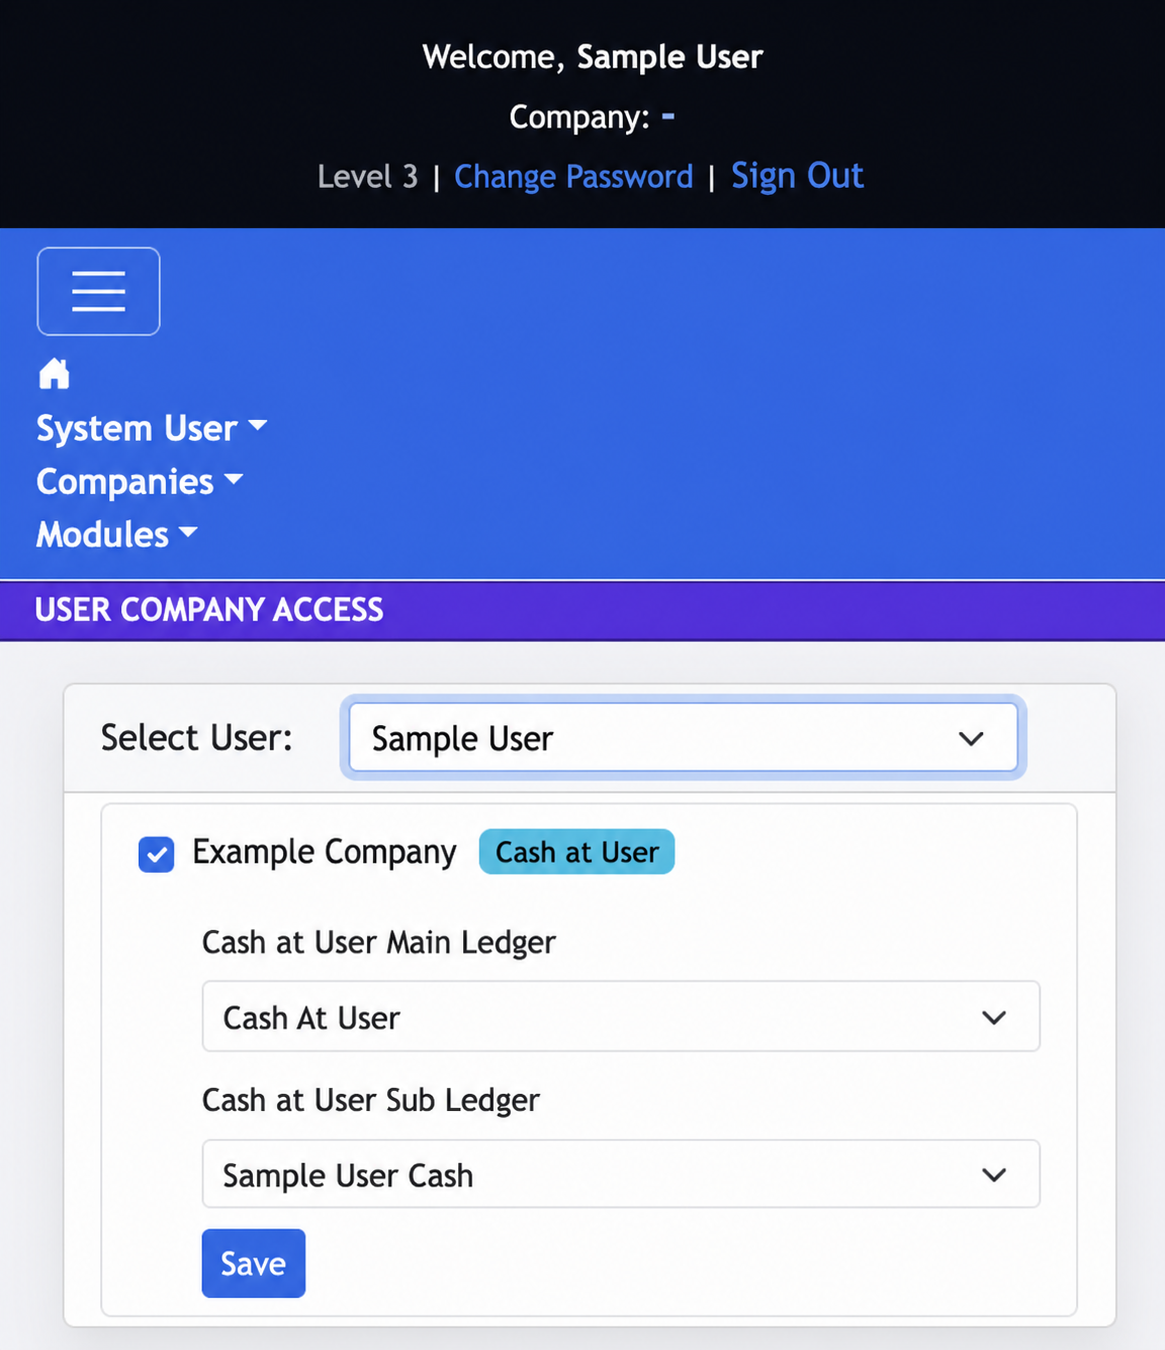
Users can see all companies in the tenant, but only companies assigned to them remain enabled for their work. A new tenant normally starts with one company created during setup.
- Use an individual account for each person; do not share passwords.
- Assign only the companies required for that person’s work.
- Review access when responsibilities change or a user leaves.
- Use Change Password immediately if credentials may have been exposed.
Review user activity and snapshots
User Activity/Log records activity with its timestamp, user ID, description and IP address. Use it to understand what action was performed and when.
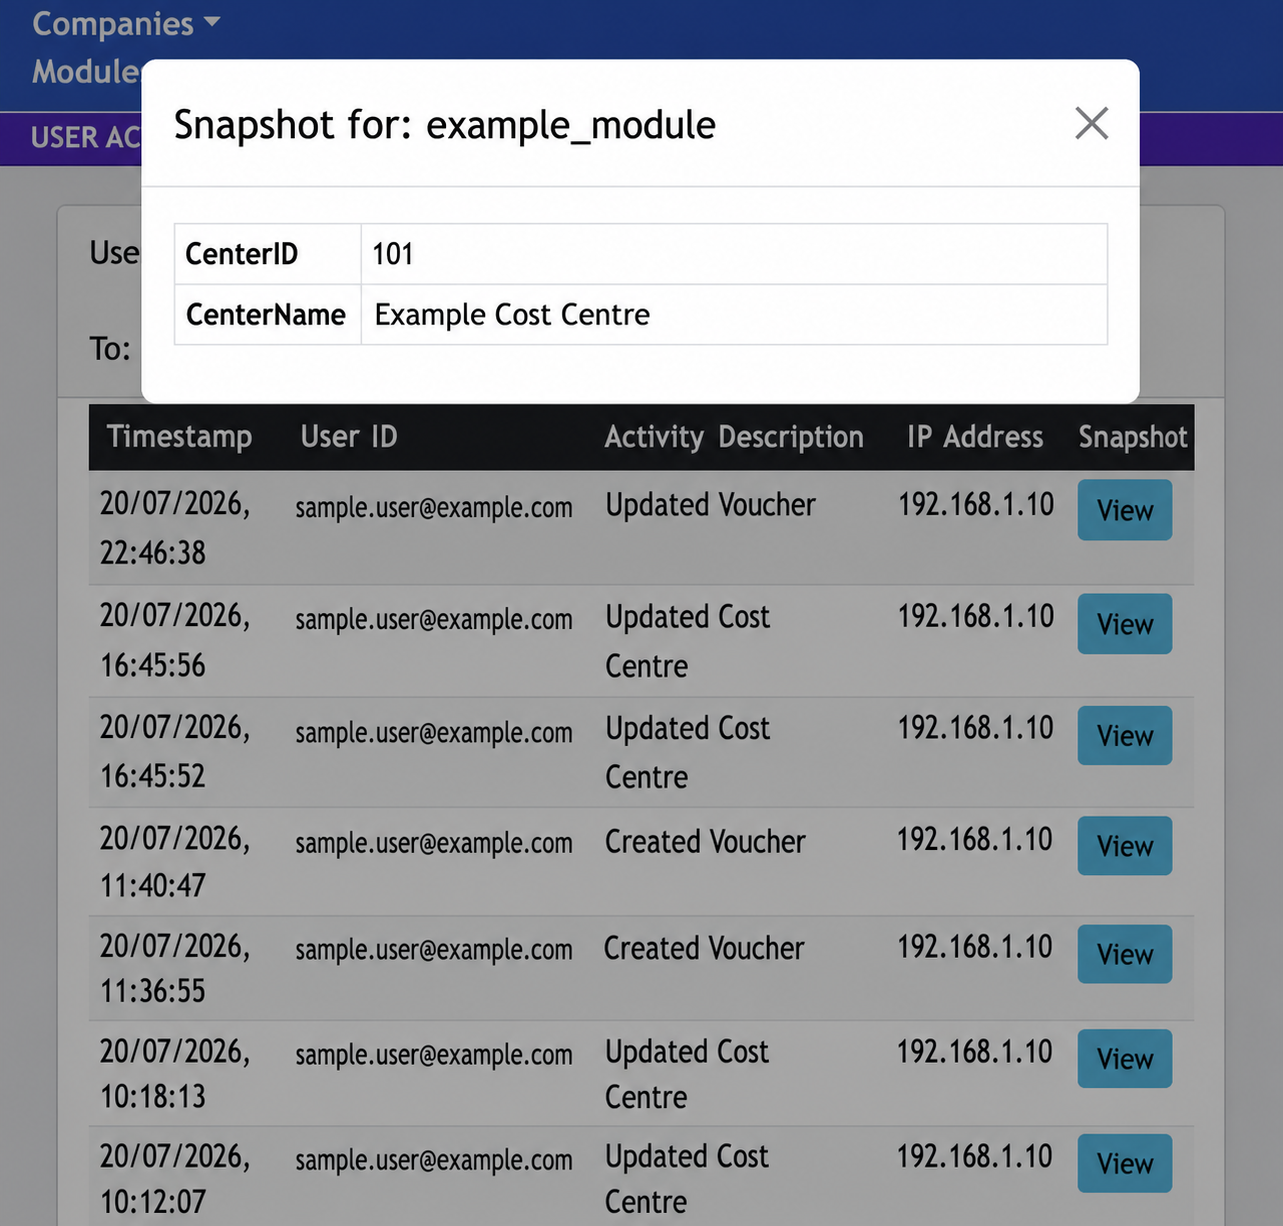
Click View beside a log entry to display its snapshot. The snapshot helps an administrator investigate the state that was captured for that recorded activity.
Cash at User for voucher posting
Cash at User lets an administrator select the ledgers a user will use when posting vouchers. This makes it possible to keep a user’s cash posting connected to the appropriate main ledger and sub-ledger.
- 01Select the user
Choose the user whose company access and voucher posting setup you want to manage.
- 02Enable the company
Select the company in which the user should be allowed to work.
- 03Configure Cash at User
Select the Cash at User main ledger and the appropriate Cash at User sub-ledger.
- 04Save and verify
Save the configuration, then verify voucher posting with the intended user and company.
Managing detailed module permissions
In User Role Management, select the user whose permissions you want to review. The permission grid lets an administrator manage Create, Edit, Basic Update, Delete and View access for individual modules.
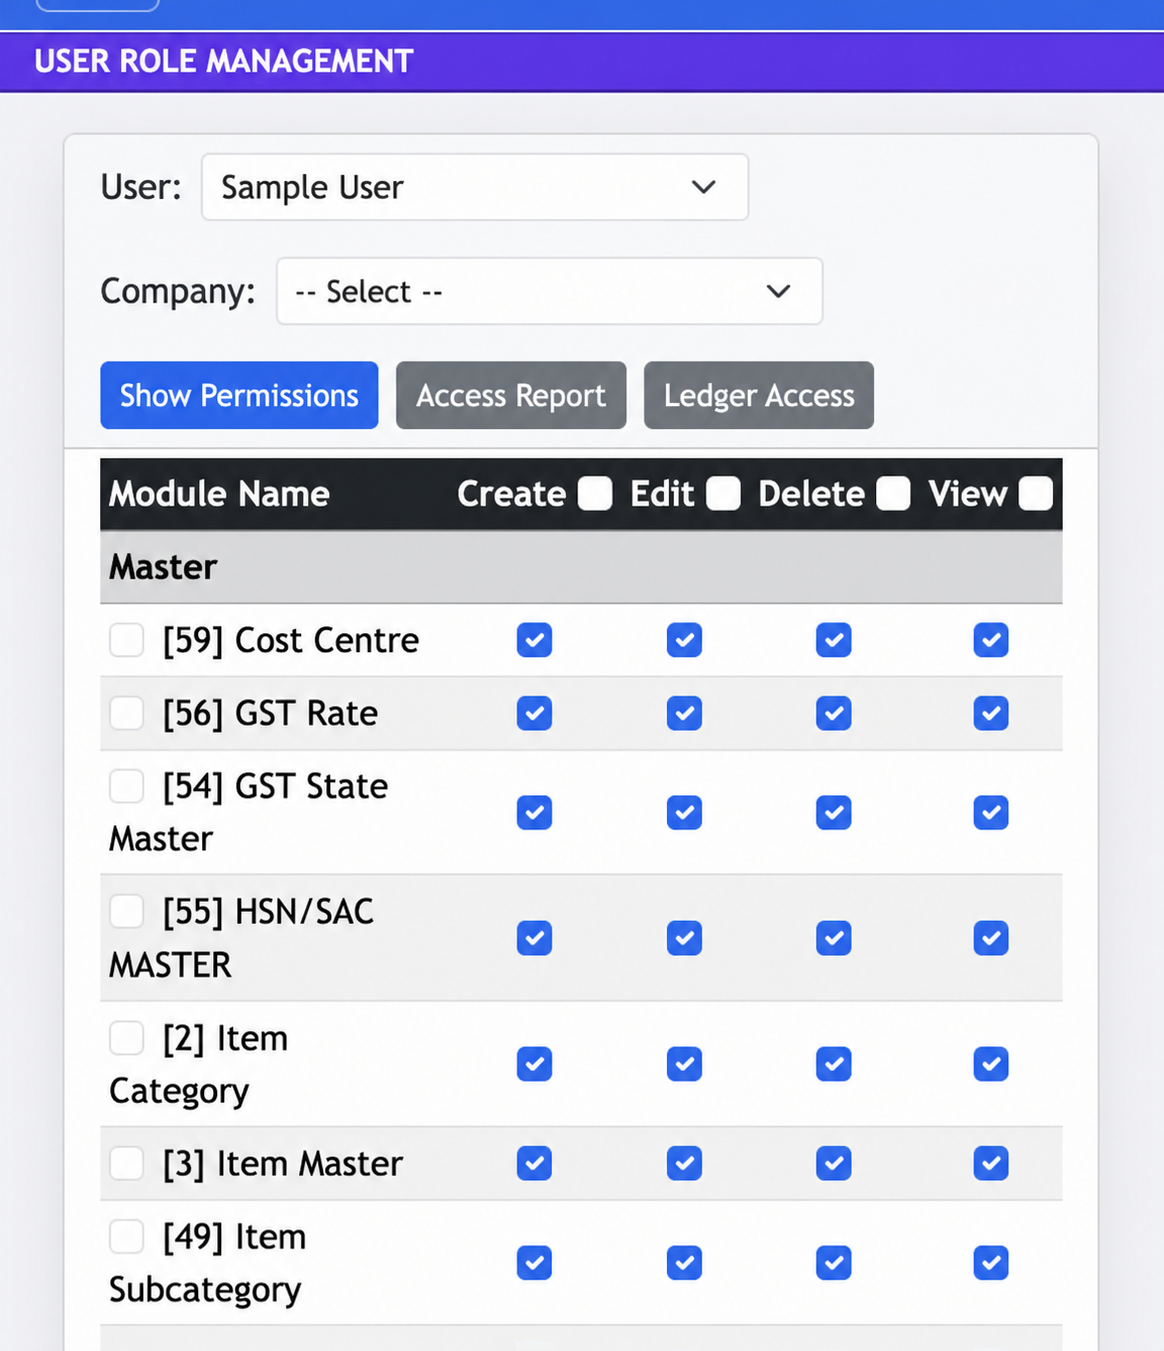
Company selection is optional for the core built-in modules. If no company is selected, Jhapu shows those core modules. Select a company when managing permissions for custom modules created for that company.
Basic Update: limited editing without reposting
Basic Update is a separate permission for carefully selected descriptive fields. It lets a user correct permitted information without opening the full Edit workflow or changing accounting, stock, GST, totals, approvals or line-item data.
- 01Enable Basic Update for the module
Select the Basic Update checkbox in User Role Management. If the module supports it, Jhapu opens the field-selection dialog.
- 02Choose the permitted fields
Select only the safe fields that this user may change. At least one field is required.
- 03Save the permission
Jhapu stores the Basic Update grant and its field allowlist independently from normal Edit permission.
- 04Use Update Basic from the list
The user receives a restricted form containing only the fields allowed by the administrator.
It supports safe text, fixed-choice and date fields configured for Basic Update. Lookup, calculated, sequential, key, system and financial-year fields are excluded. Grant normal Edit permission when the user must change the complete transaction.
User Access Report
Use the User Access Report to review a user’s effective module permissions for the selected company context. It provides a clear matrix of Create, Edit, Basic Update, Delete and View rights across the available modules.
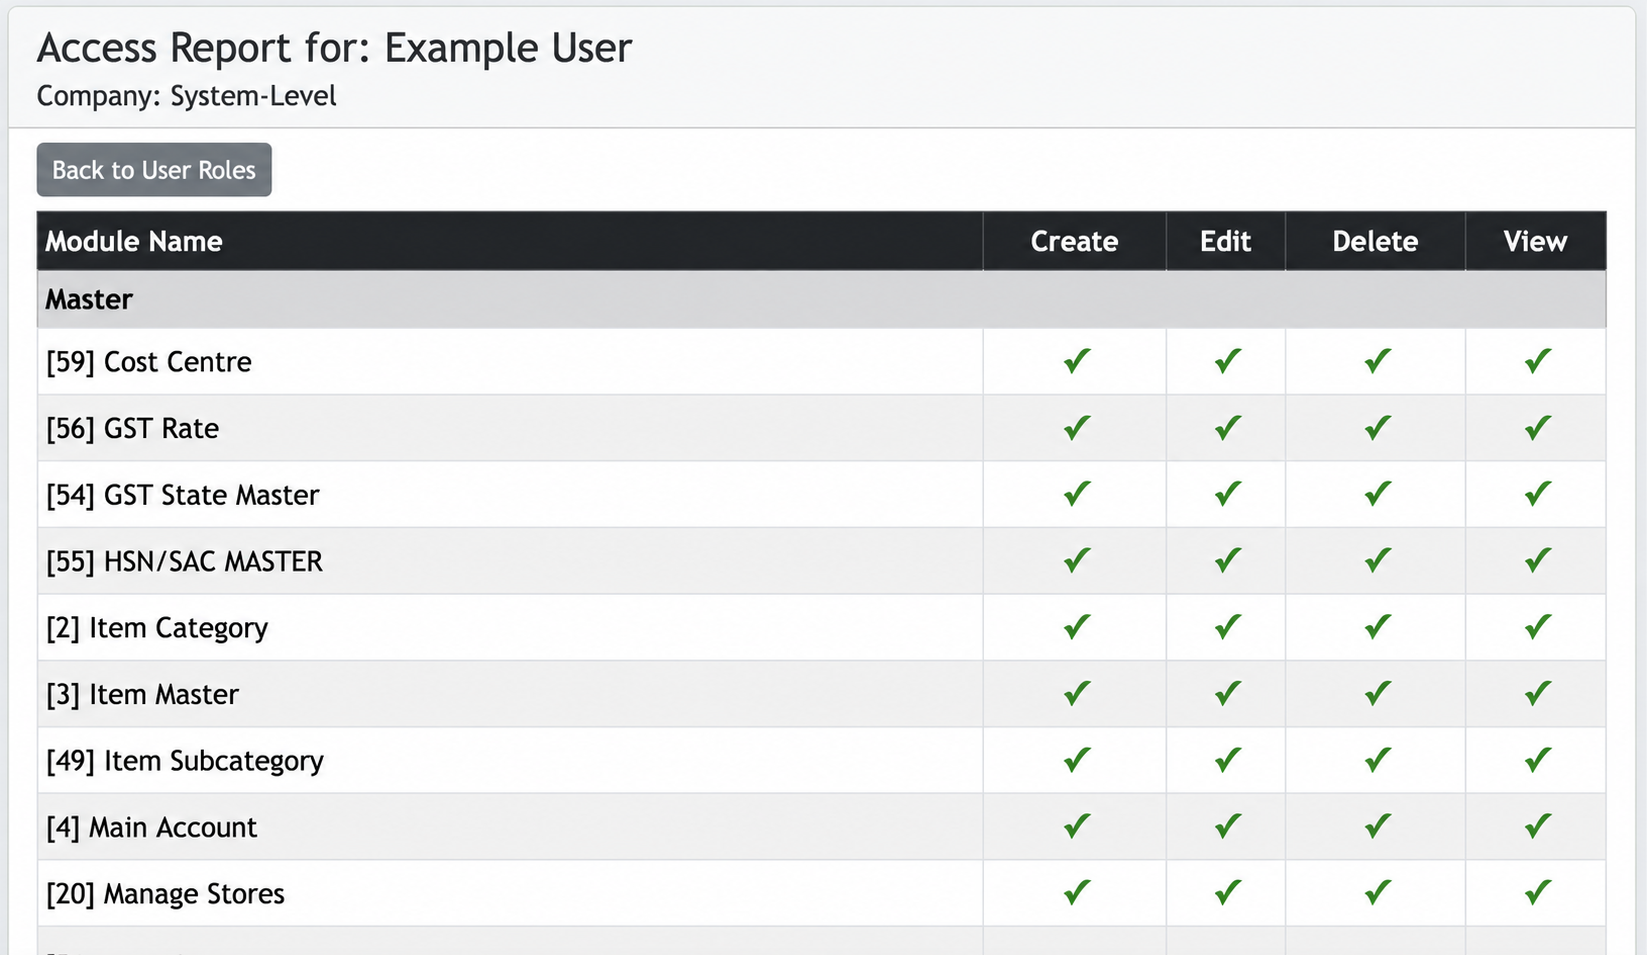
Use this report to confirm that the user has only the permissions required for their role, particularly before enabling access to sensitive accounting or administration modules.
User Ledger Access
User Ledger Access controls which main ledgers and sub-ledgers a user may work with in a selected company. Administrators can grant access to every ledger or choose individual ledger records.
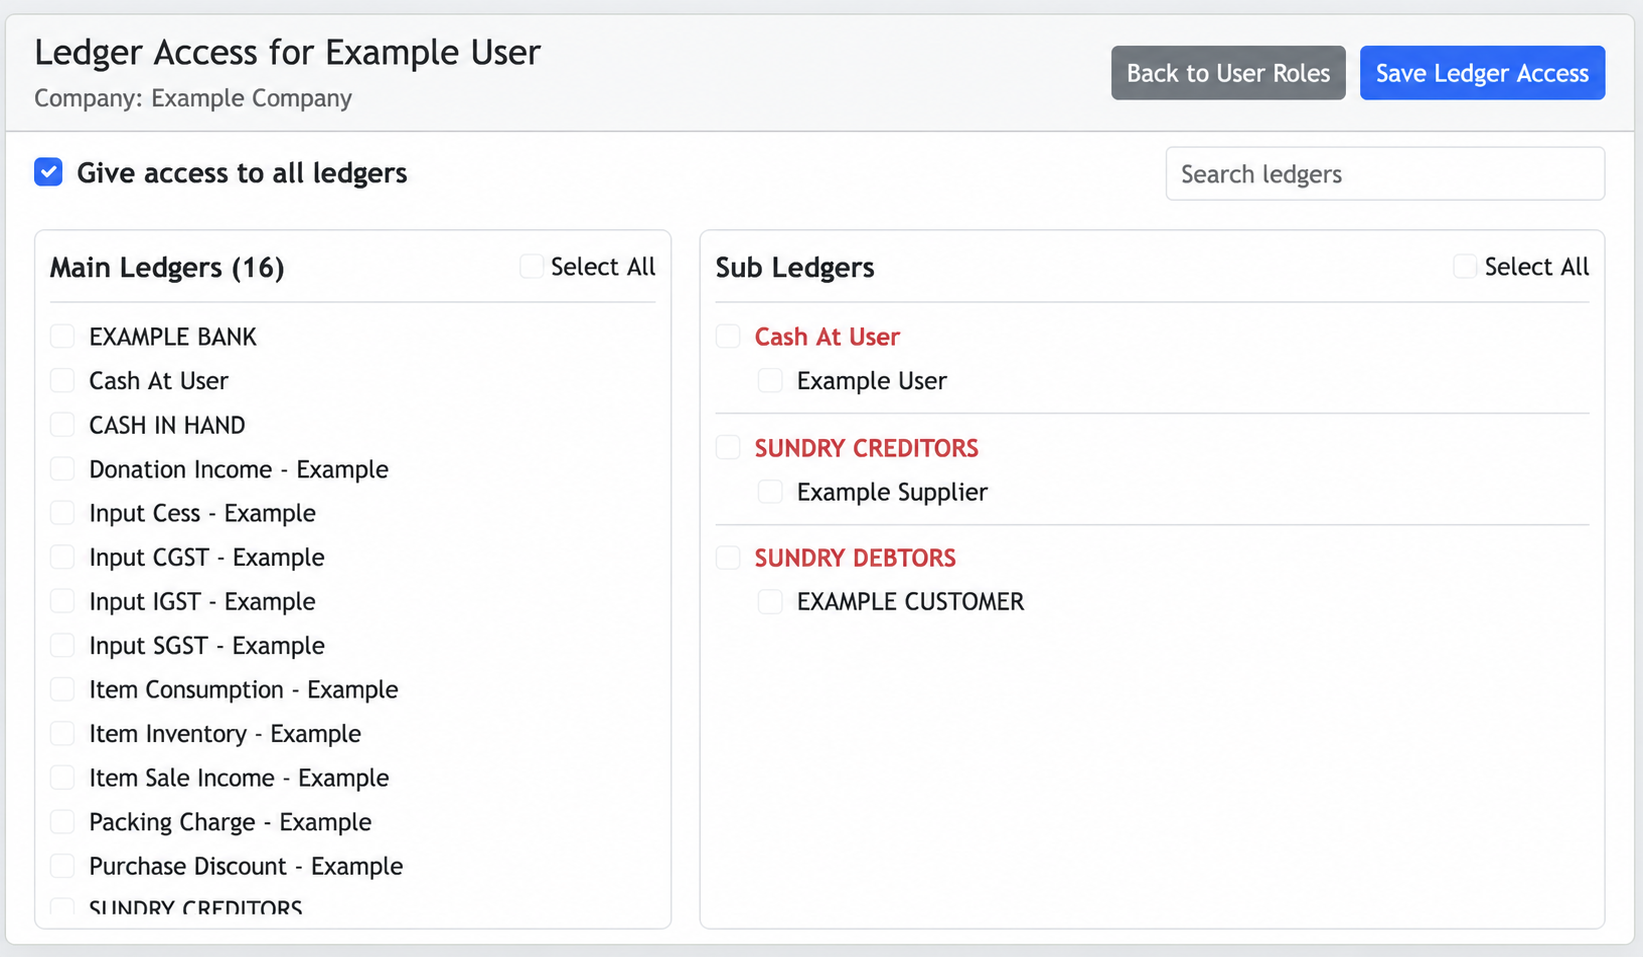
- Give access to all ledgers: enable this option when the user should have access to every available ledger.
- Main Ledgers and Sub Ledgers: use the individual checkboxes or Select All controls for a more limited assignment.
- Search ledgers: quickly locate a ledger in a larger chart of accounts.
- Save Ledger Access: save the selected access after review.